
Last updated October 16, 2026
 Water damage drying
 Fire & smoke cleanup
 Mold remediation
 Storm response
 Sewage cleanup
 Reconstruction
Free visual inspection and a written scope of work before any mitigation begins - photos, moisture readings, and drying logs go in your claim file
The scope we write is the scope we bill. Anything new gets shown to you, in writing, before we touch it.
Get your free estimateWater Damage Restoration Maintenance Checklist for Riverside Homeowners
Riverside’s water hardness averages 300 – 400 mg/L as calcium carbonate, among the highest in Southern California. That mineral load silently narrows supply lines and corrodes valve seats years before any visible leak appears. A national water damage checklist won’t catch what Riverside’s specific climate and water chemistry do to a home. This guide gives you a room-by-room maintenance plan calibrated to Riverside’s actual risk profile: hard water, two real rain windows, extreme summer heat, and aging tract-home infrastructure. For a deeper dive into professional recovery options, see our Water Damage Restoration services. You’ll learn where water fails first in Riverside homes, how to inspect those points in minutes, and what to do when a problem shows up.
Quick Answer
A water damage prevention checklist for Riverside homeowners should focus on six failure points: hard-water mineral buildup at supply lines and shut-off valves, seasonal roof-to-foundation inspection timed to Riverside’s December – February and March – April rain windows, a water meter test for slow leaks, attic inspection for heat-accelerated sheathing degradation and winter moisture traps, and a 12-month scheduling framework that maps tasks to the correct season. For related reading, see The Complete Guide to Damage Restoration in Riverside.
Restoration work we handle
Table of Contents
- How Riverside’s Hard Water Creates Hidden Leak Risks
- The 3-Minute Water Meter Leak Test
- Room-by-Room Checklist for Riverside Homes
- Attic Inspection: Riverside’s Heat and Winter Moisture Problem
- Seasonal Scheduling: The 12-Month Riverside Maintenance Calendar
- Common Mistakes to Avoid
- When to Call a Professional
- Frequently Asked Questions
How Riverside’s Hard Water Creates Hidden Leak Risks
Most water damage in Riverside homes doesn’t start with a dramatic pipe burst. It starts with minerals. Riverside’s municipal water supply carries 300 – 400 mg/L of calcium carbonate. That mineral load deposits inside braided supply lines, at valve seats, and around compression fittings. Over seven to ten years, those deposits narrow the inner diameter of supply lines and create uneven pressure points. When a line finally fails, it’s rarely sudden. It’s the end of a slow process that showed warning signs months earlier.
Here’s what hard water does to the six most common failure points in Riverside homes, and what to look for at each one.
Braided Supply Lines Under Sinks and Behind Toilets
Braided stainless supply lines hide mineral buildup well. The outer weave looks fine while the inner rubber tube stiffens and cracks. In our experience, Riverside bathrooms built between 1995 and 2010 are the highest-risk category, because original supply lines from that era are now 15 to 30 years old.
What to check: run your fingers along the braided line and feel for hard spots or bulges. Look for white crust at the nut connections. If a line feels stiff when you bend it slightly, the inner tube has mineralized. Replace any braided line that shows white mineral crust at either end, even if it’s not leaking yet. A replacement line costs under $10. The water damage from a failed line routinely runs into the thousands.
Angle Stops and Shut-off Valves
Riverside’s mineral content corrodes valve seats from the inside. The first sign is usually a valve that won’t fully close, or one that drips from the stem when you turn it. Most homeowners discover a failed angle stop the hard way: during a toilet replacement or sink repair, when the valve won’t shut off and the water keeps running.
What to check twice a year: turn each shut-off valve a quarter turn closed, then back open. Do this at every sink, toilet, and the washing machine. If a valve feels gritty, stiff, or won’t seat fully, have it replaced before you need it. This takes a plumber under an hour per valve and prevents a situation where a small repair becomes a full-home water event.
Water Heater Drain Valve and Tank Bottom
Hard water settles at the bottom of a water heater tank as sediment. In Riverside, that sediment layer builds faster than in coastal cities. Over time, sediment insulates the tank bottom from the water, causing the steel to overheat, weaken, and eventually crack. The drain valve, typically a plastic or brass fitting at the bottom of the tank, is another mineral trap.
What to check: place a white paper towel under the water heater drain valve overnight. Any moisture or mineral staining means the valve is weeping. Listen for popping or rumbling sounds when the heater runs, which indicates sediment buildup. If your water heater is over 10 years old and has never been flushed, the risk of a tank failure goes up sharply. A failed water heater releases 40 to 50 gallons of water into the garage or house in under an hour.
The 3-Minute Water Meter Leak Test
Most water damage checklists omit this test entirely, which is a serious gap. A water meter tells you in minutes whether you have a hidden leak anywhere in the home’s supply system. Riverside homes have individual meters, typically in a concrete box near the street or sidewalk. You can read the meter without any special tools.
Here’s the test, step by step:
- Locate your water meter. It’s usually in a concrete box near the curb or sidewalk, marked “water.”
- Turn off all water inside the home. This includes ice makers, water softeners, irrigation timers, and any drip systems. Do a quick walkthrough to confirm nothing is running.
- Open the meter box and find the dial or digital readout. Most Riverside meters have a small triangular or gear-shaped leak indicator, and a numerical readout in cubic feet or gallons.
- Note the exact reading. Wait 10 minutes without using any water. Go back and read the meter again.
- If the reading changed at all, you have a leak somewhere between the meter and the house, or inside the house. The faster the dial spins, the bigger the leak.
If the leak indicator is moving while everything inside is off, you have a service line leak or a leak inside a wall or slab. If the meter is still but you suspect an irrigation leak, run each irrigation zone separately and watch the meter for that zone.
Run this test at least twice a year in Riverside. Do it before the December rain window and again after the April rains end. That timing catches two things: service line leaks that cold soil temperatures may have stressed, and irrigation system damage from winter moisture that sat in the lines.
Room-by-Room Checklist for Riverside Homes
Riverside’s housing stock spans the full range: 1920s Craftsman bungalows in the Wood Streets, 1950s and 60s ranch homes in the Arlington area, and large tract developments built from the 1980s through the 2000s in Orangecrest, La Sierra, and Mission Grove. Each era has its own water risk pattern. But every room in every Riverside home benefits from the same targeted inspection sequence.
Kitchen
- Inspect braided supply lines under the sink for mineral crust, stiffness, or bulges.
- Turn the shut-off valves a quarter turn closed and back open.
- Check the dishwasher drain hose for kinks or sagging. A sagging hose holds standing water and mineral sediment, which degrades the hose wall.
- Look under the refrigerator if it has an ice maker or water dispenser. The supply line is often a small-diameter plastic or copper tube that is especially vulnerable to Riverside’s minerals.
- Run the garbage disposal and check the sink drain connections for slow drips while it runs. Vibration from the disposal loosens slip joints over time.
Bathrooms
- Check supply lines and shut-off valves at every sink and toilet, exactly as in the kitchen.
- Inspect the toilet tank-to-bowl connection. A slow leak here is silent and constant, and in Riverside homes with hard water, the mineral ring at the base of the toilet is often the first visible sign.
- Test the toilet flapper: put a few drops of food coloring in the tank and wait 15 minutes. Color in the bowl means the flapper is failing. A running toilet wastes up to 200 gallons a day and masks other problems.
- Run the shower for two minutes and watch the tub spout connection behind the wall for any water seepage. Use a flashlight and look at the wall seam.
- Inspect the caulking and grout lines. In Riverside’s dry heat, grout cracks and separates from the tub and shower pan. Water enters these cracks during every shower and wets the wall framing behind the tile.
Laundry Room
- Inspect washing machine supply hoses. If they are rubber, replace them with braided stainless hoses this month. Rubber hoses fail without warning and are one of the top causes of interior flooding in Riverside homes.
- Check the washing machine shut-off valves. Many laundry rooms in older Riverside homes have valves that have not been turned in 20 years. They seize open, which means a hose failure cannot be stopped at the valve.
- Verify the drain hose is properly secured into the standpipe. A dislodged drain hose floods the laundry room at 17 gallons per minute during the spin cycle.
- Look for rust stains or mineral deposits on the water heater, if the heater lives in the garage or laundry room.
Exterior and Foundation
- Walk the perimeter and look for soil that stays wet after 48 hours without rain. In Riverside’s arid climate, persistent wet soil indicates a service line or irrigation leak.
- Check that downspouts extend at least three feet from the foundation. In Riverside’s clay-heavy soils, water pooling at the foundation creates hydrostatic pressure that forces water through slab cracks.
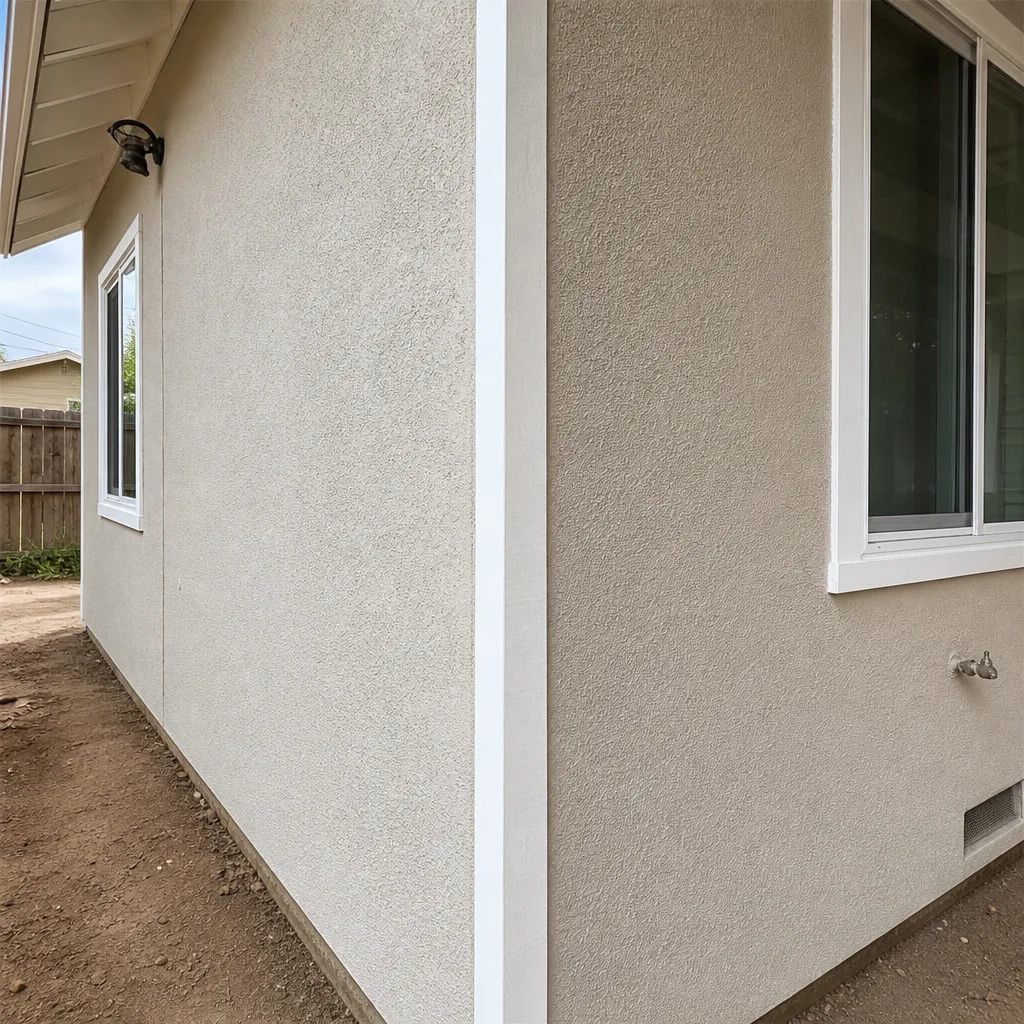
- Inspect the stucco or siding for vertical cracks wider than 1/8 inch. Winter rains enter these cracks, and Riverside’s freeze-thaw cycle, though mild, widens them each year.
- Check window wells and below-grade window frames for mineral staining, which signals water is entering during rain events.
- Walk the roofline from the ground and look for missing or cracked tiles, lifted flashing, and debris in the rain gutters.
Attic Inspection: Riverside’s Heat and Winter Moisture Problem
Riverside’s summer heat is an attic problem that becomes a water damage problem in winter. Temperatures in an unventilated Riverside attic regularly exceed 140°F from June through September. That sustained heat accelerates the degradation of plywood sheathing, roof felt, and adhesive bonds. When the December rain window arrives, the roof deck cannot shed water the way it did when it was newer. Moisture enters through heat-opened seams and sits against the sheathing.
Here’s what to look for in a Riverside attic, and when to look.
What to Inspect
- Look at the underside of the roof sheathing for dark stains, white mineral residue, or warped panels. Dark stains are active or past moisture. White residue is mineral left behind after water evaporated, a pattern we see consistently in Riverside homes with hard water and roof leaks.
- Check the insulation for wet spots, clumping, or compacted areas. Wet insulation loses its R-value and stays damp for weeks, feeding mold growth in a space that is already hot.
- Look for daylight coming through the roof deck. Any visible pinprick of light is a direct water entry point during rain.
- Inspect bathroom and kitchen exhaust fan ducts. They should terminate outside the home, not into the attic. In many Riverside tract homes built before 2000, bathroom fans vent directly into the attic, which dumps warm, humid air into a space that’s already hot. That moisture condenses on the underside of the roof deck during winter.
- Check for animal entry. Riverside’s raccoon and squirrel population is active year-round, and damaged soffit vents are the entry point. Animal activity shreds insulation and creates pathways for water.
When to Inspect
Do the full attic inspection in October, before the December rain window, and again in March when the rainy season ends. October is the priority: you want to find and fix roof deck problems before the first real rain, not after water has already entered. The March inspection tells you what the winter rains did and what needs repair before summer heat bakes the moisture into the sheathing.
Seasonal Scheduling: The 12-Month Riverside Maintenance Calendar
A maintenance checklist that lists everything without telling you when to do it fails by April. Riverside has two real rain windows: December through February, and a second lighter window from March through April. The rest of the year is hot and dry. Your maintenance schedule should track those windows closely.
October (Pre-Rain Window)
- Clear rain gutters and downspouts. Riverside’s dry summer drops a lot of dust, leaves, and debris into gutters that have been dry for months.
- Inspect the roof from a ladder or the ground. Replace cracked tiles, re-seat lifted flashing, and repair any damaged shingles.
- Do the full attic inspection described above.
- Run the water meter leak test.
- Turn every shut-off valve in the home a quarter turn and back open.
- Inspect washing machine hoses and replace rubber hoses with braided stainless.
December (First Rain Window)
- After the first heavy rain, walk the perimeter and check for standing water against the foundation.
- Inspect the attic for wet insulation or water staining on the sheathing.
- Check window wells and below-grade windows for mineral staining or damp drywall.
- Verify that downspouts are still extending three feet or more from the foundation after wind and rain.
March – April (Second Rain Window)
- Do the full attic inspection again to catch damage from winter rains before summer heat sets in.
- Run the water meter leak test a second time.
- Inspect all exterior caulking and stucco cracks no wider than 1/8 inch and seal any that have grown.
- Check for water staining at the base of stucco walls, where winter splash-back wets the siding.
June – September (Heat Season)
- Check for signs that the attic heat is degrading roof materials: look at the roof from the ground for curling shingles, cracked tiles, or lifting flashing.
- Inspect bath and kitchen exhaust fan ducts for dust buildup. Restricted ducting increases attic moisture and heat.
- Monitor the water heater. Summer heat plus hard water sediment shortens tank life. If the heater is over 10 years old, start budgeting for replacement.
- Check under sinks for slow mineral crust forming at supply line nuts.
Common Mistakes to Avoid
- Ignoring mineral crust on supply lines. In Riverside, that white crust is not cosmetic. It’s calcium from 300 – 400 mg/L hard water, and it means the fitting is weeping or the line is failing. Replace the line when you see it, not when it fails.
- Using rubber washing machine hoses. Rubber hoses are the highest-risk water component in a Riverside laundry room. Replace them with braided stainless hoses immediately. If you’re unsure which type you have, look under the machine.
- Testing shut-off valves only when you need them. By then it is too late. Turn every valve a quarter turn closed and back open every six months. A seized valve discovered during a toilet replacement turns a one-hour job into a whole-home water event.
- Skipping the water meter test. Most checklists omit this entirely. It catches slow slab leaks and service line leaks before they become structural damage. Run it twice a year.
- Doing the attic inspection only once a year. Riverside’s summer heat and winter rain windows damage roof decks on different schedules. October and March are both non-negotiable.
- Assuming new construction means no water risk. Many Riverside tract homes built from 2000 onward used PEX supply lines, which resist mineral buildup but fail at fittings and manifolds. Inspect manifolds and access panels in newer homes just as carefully as supply lines in older ones.
- Waiting for visible water damage to act. By the time a ceiling shows a water stain, water has been traveling behind the drywall for days or weeks. The meter test and the seasonal inspections are designed to catch water before it becomes visible.
When to Call a Professional
Some water problems are maintenance tasks. Others require professional equipment and training. Call a professional if you find water staining on a ceiling or wall that is actively damp, a water meter test showing movement with everything off, water entering through a roof leak during rain, or a shut-off valve that won’t close. These are not DIY situations. The water is already inside the building envelope, and drying it properly requires moisture meters, air movers, and dehumidifiers placed correctly. Water Damage Restoration in Riverside done incorrectly leaves hidden moisture that feeds mold for years. Tidemark Water Damage Riverside home offers free estimates in Riverside for any water intrusion, no matter how small it looks. Call (341) 212-7342 and a real person answers.
Frequently Asked Questions
Twice a year at minimum: once in October before the December rain window, and once in March after the April rains end. Riverside’s two rain windows and extreme summer heat mean a once-a-year inspection misses the transition between one season’s damage and the next. The full inspection takes about two hours and covers every room, the attic, the meter, and the exterior.
Run the water meter test described above: turn off all water use inside and outside, note the meter reading, wait 10 minutes, and check again. Any movement means a leak. The most common hidden leaks in Riverside homes are slab leaks on the service line, slow drips at toilet flappers, and irrigation line breaks. If you suspect a slab leak, call a restoration professional to confirm before any excavation starts.
Hard water directly causes water damage. Riverside’s 300 – 400 mg/L calcium carbonate load narrows supply lines, corrodes valve seats, and accelerates water heater tank failure. The damage accumulates silently over years, then fails suddenly. Mineral crust at supply line nuts is an early warning sign that the fitting is already weeping.
Washing machine hose failures, water heater tank ruptures, failed supply lines at sinks and toilets, slab leaks on the service line, and roof leaks during the December – February rain window. In our experience serving Riverside since 2006, the first three are the most preventable, and all three are checked in the maintenance calendar above.
Small, contained spills that dry within 24 hours can be cleaned with towels and fans. Anything larger, anything that has wet drywall or flooring, or any water that sat for more than a day should be handled by professionals with proper drying equipment. Mold Remediation in Riverside after improper drying is significantly more expensive than proper drying on day one. If you’re not sure, call (341) 212-7342 and describe what you see. We’ll tell you over the phone whether it needs equipment.
Most policies cover sudden and accidental water damage, such as a burst pipe or a failed water heater. They typically do not cover damage from gradual leaks, lack of maintenance, or flooding from outside water. If you have water damage, photograph everything before cleanup starts. Fire Damage Restoration in Riverside and water damage restoration both work with insurance adjusters regularly. Tidemark can coordinate directly with your adjuster and provide photo documentation of everything we find and do.
The Bottom Line
Riverside’s water damage risk profile is not generic. Hard water, two rain windows, extreme summer heat, and older housing stock combine to create specific failure points that a national checklist misses. A Riverside homeowner’s maintenance plan should be built around six things: inspecting braided supply lines and shut-off valves for mineral damage, running the water meter leak test twice a year, inspecting the attic in October and March, scheduling the full maintenance calendar around Riverside’s rain windows, replacing rubber washing machine hoses immediately, and calling a professional at the first sign of water where it should not be. Most water damage is preventable. The maintenance calendar above is the prevention plan. Explore more guides & resources for year-round home protection.
Written by Rick Sumner, Owner at Tidemark Water Damage Riverside, serving Riverside since 2006.
See the difference
 Before
 After
After Before
 After
After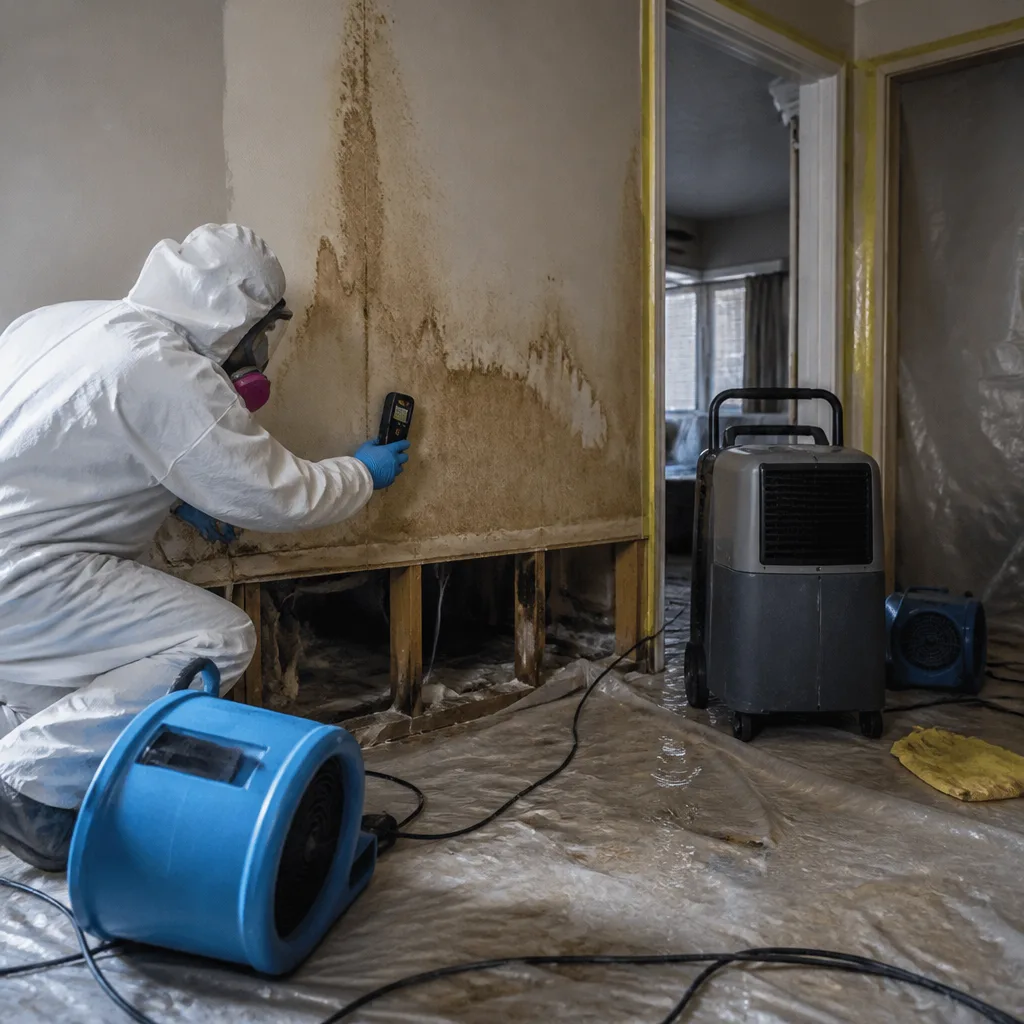 Before
 After
After